Before using the network, users need to perform some essential network settings on the operating system, including IP address, subnet mask, gateway address, DNS server address, and so on. In the following sections, we will use the Windows XP operating system as an example to explain how to perform basic network configuration on your computer. If you are using Windows 98, Windows 2000, or another Windows operating system, the configuration methods are largely similar, and you can also refer to the examples below to configure your computer accordingly.
Network Configuration Steps for Windows XP Operating System:
1. After the network card is correctly installed, click the Start menu in the lower-left corner of the system, select Control Panel, and then double-click on Network Connections;
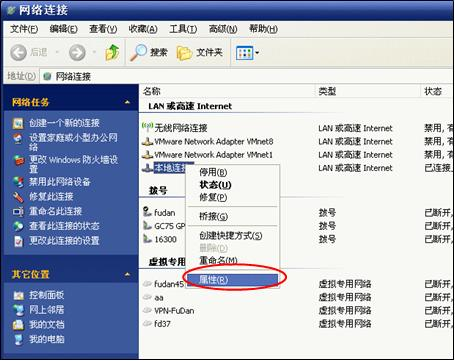
2. In the newly opened Network Connections window, right-click on the Local Area Connection icon and select Properties;
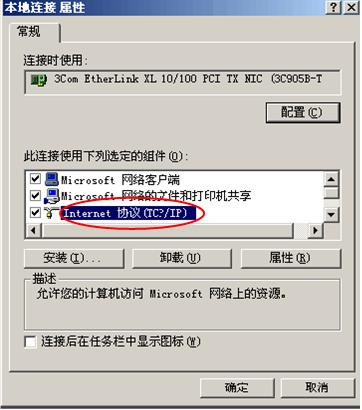
3. In the Local Area Connection Properties dialog box, select the Internet Protocol (TCP/IP) item, and then click the Properties button;
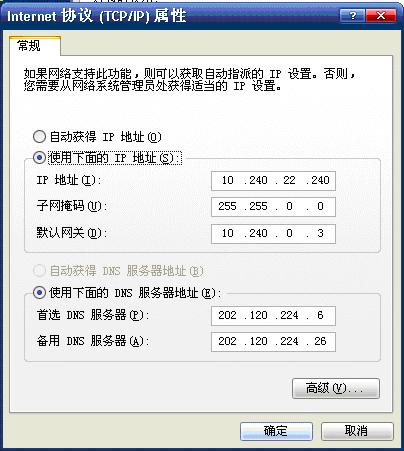
4. In the Internet Protocol (TCP/IP) Properties dialog box, select the option Use the following IP address, then enter the IP address, subnet mask, and default gateway in sequence. Next, select the option Use the following DNS server addresses, and enter the DNS server addresses listed below:
Handan Campus:202.120.224.26,61.129.42.6
Fenglin Campus:202.120.79.34,202.120.79.35
Zhangjiang Campus:202.120.224.26,61.129.42.6
Jiangwan Campus:202.120.224.26,61.129.42.6
5. Click OK to complete the TCP/IP settings. At this point, you have completed all the necessary network configurations required for internet access! Open an Internet Explorer window and visit the homepage of Fudan University http://www.fudan.edu.cn,If you can see the relevant page, then congratulations — you have successfully completed the required configuration and can now access the internet!